
How to self-publish your first book, the indie way

In September, I published my first e-Book, “The e-Residency program of Estonia: Launch and run a location independent business 100% online“. It was an incredible experience. I decided to self-publish my book on Amazon, taking care of everything myself.
Why? Because I wanted to be free to decide about the contents of the book, and where and how to publish it. That’s the same reason why I self-published all the music of Bosques de mi Mente, my minimalist piano project. Freedom is important for me as an author. More than money.
However, money was also an important factor. Not having a lot of money to invest in the book, I could not afford a professional editor or a publishing firm, advertisement, etc. I went the indie way.
Overall, it’s been an intense experience, with its lights and shadows. In this post, I want to share my experience, what I learned, and show you how to go from a markdown script to a published book on Amazon’s KDP.
The Writing process
Writing the book has absolutely been the best part of the process. I love writing. I don’t know why, but I get more joy from an active creation process than from a passive consumption one. I.E: I prefer writing than reading, and composing music than listening to somebody else’s.
In my experience, it is worth defining a detailed outline of the book beforehand. Even if you spend some time on it. It will serve as the blueprint for your book and will help you to:
- know what to write in every chapter and every section of the chapter.
- avoid duplicating information in different chapters
- avoid missing important information
I wrote the book using iA Writer on my iPad Pro. I really love the markdown syntax, because it allows me to focus on writing while defining the structure and format of the book easily. Almost transparently.
So I created a markdown file for every chapter, and called it “chapter 1”, “chapter 2”, etc. Then, for every chapter, I defined the structure using markdown headings like this:
# Chapter 1

(intro)

## Section 1

(contents of section 1)

## Section 2

(contents of section 2)
...

## Section n

(contents of section n)

## Conclusion

(outro)
I wrote a small comment under each section with a brief description or an enumeration of the topics to discuss.
Writing each section
When you finish this process, you will end up with a well-defined scheme of your book. It will work as a blueprint and allow you to work on one section at a time. Now it’s time to write them. Start with any of them. You don’t even need to write them sequentially.
When writing a section, focus completely on it and just let the words flow. Don’t censor yourself or try to write “beautifully”. Don’t even check your grammar, syntax or style. Just write everything that comes to your mind. You will have time to edit the book later. Write as you would talk to a friend, in colloquial language.
I’ve found out that when you stop to check what you are writing or correct a word or sentence, you lose the flow of your thoughts. Instead, try to switch off the rational and critical part of your brain, and just write. Don’t stop until you have dumped everything you wanted to cover in that section and are completely devoid of further ideas to develop it.
That will make the process a lot more enjoyable. The fact that you can write the sections in any order you like will also help you write faster.
Editing the book
Once you have written all sections of the book, it’s time to edit it. Professional editors charge a lot of money. Not that their work is not worth it. On the contrary, self-editing my own book showed me how demanding and time-consuming the edition phase can be.
However, when you are just starting, or if you are not a professional writer, spending 1500-5000€ to edit your book is not always reasonable. That’s why I decided to self-edit the book myself.
Even though it took me a lot of time, and was definitely a challenging experience, it was worth it. I learned a lot, and it made me a better writer. In this blog post, I describe the whole process of self-editing my book in detail.
Self-Publishing… on Amazon?
Why did I choose Amazon? If you are a frequent reader of my blog, you know I hate Amazon. I feel about them like I felt about Microsoft in the 90s. It’s something that needs to disappear. From its monopolistic tactics to its dated, unresponsive web interfaces or its archaic points of view about the world, I am not a big fan of the technology giant.
Amazon offers two options for authors: publishing the book on Amazon KDP only, or enrolling also in KDP select. KDP Select works as a subscription for Amazon users: they pay a monthly fee to access all books in KDP Select for free. For authors, you get exposed to a larger audience, receive a reward based on the pages read of your book by all the readers of Amazon KDP Select. The drawback is that enrolling in KDP Select implies an exclusivity agreement with Amazon. In short, you cannot publish your book anywhere else.
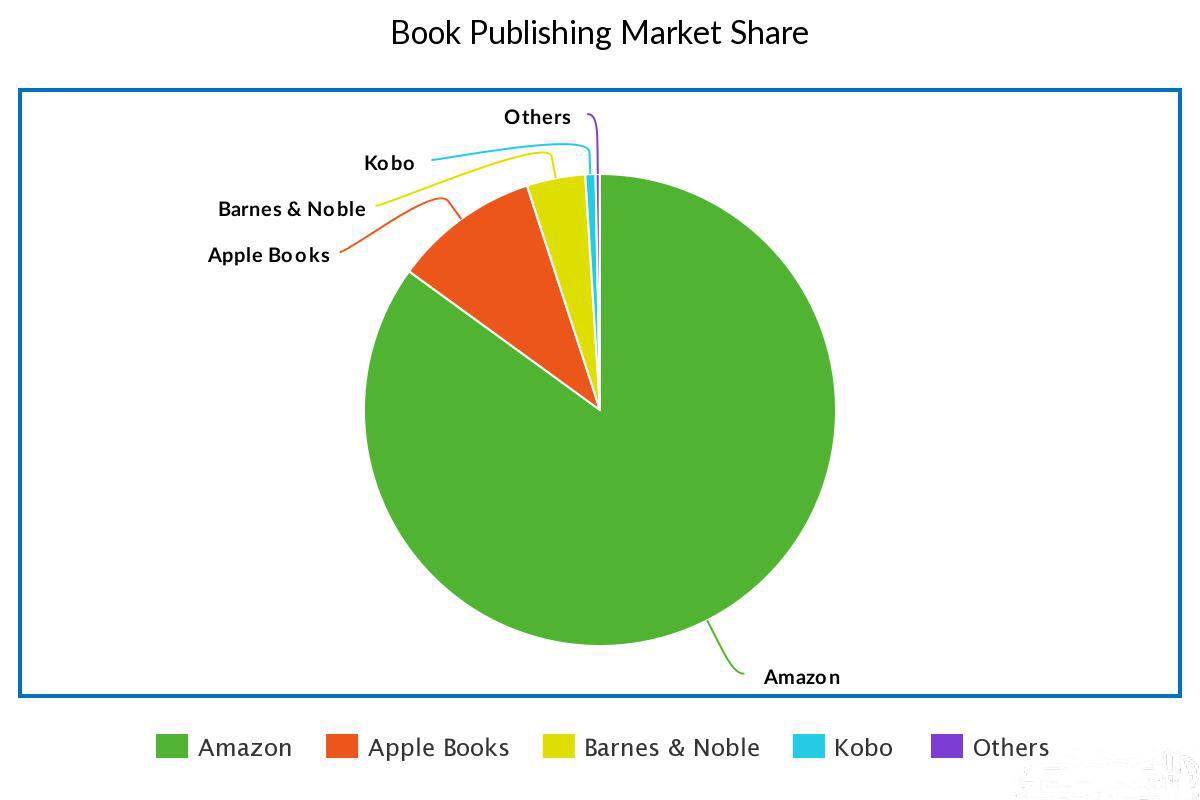
So why did I chose to publish my book on Amazon KDP and, indeed, on Amazon KDP Select, which is an exclusive platform? Because of the graph above. Unfortunately, Amazon has the market share.
I did my research, talked to some indie authors, and the conclusion was clear: their sales on Amazon clearly outweighs the rest of providers together, and the benefits of enrolling on Amazon KDP compensates for not being able to publish on other platforms.
Do your research, however, and find out what works best for you. Perhaps your audience is on a different platform and you should publish there.
How to self-publish on Amazon the indie way, step by step
Now let me put this straight. Publishing on Amazon is a pain in the ass. It has less to do with the antediluvian publishing dashboard and more to do with the weird style, cover, and document format requirements of Amazon and the fact that you need two different versions of the book. At least, if you plan on releasing a paperback version.
As I mentioned before, this guide assumes you start with a markdown file for every chapter, using the structure I described above. I did this on macOS, but you can do it on Linux or Windows too.
Putting together the chapters of the book
The first thing you need to do is put together the book in a big .md (markdown) file. So open your favorite text editor and copy and paste all book chapters. You should end up with something like this:
# Chapter 1

... (contents of chapter 1)...

# Chapter 2

... (contents of chapter 2)...

...

# Chapter N

... (contents of chapter N)...

# About the author

(last chapter with information about you, perhaps a pic or some links to your website, dedications, etc)

[^1]: footnote 1
[^2]: footnote 2
...
[^X]: footnote X
Designing the cover of your book
A common recommendation for self-publishing authors is to follow the cover style of similar books. I did some research and, honestly, what I saw was lifeless, dull, and repetitive. I didn’t want my book cover to be a copy of “The 4-hour workweek” or “The $100 Startup”.
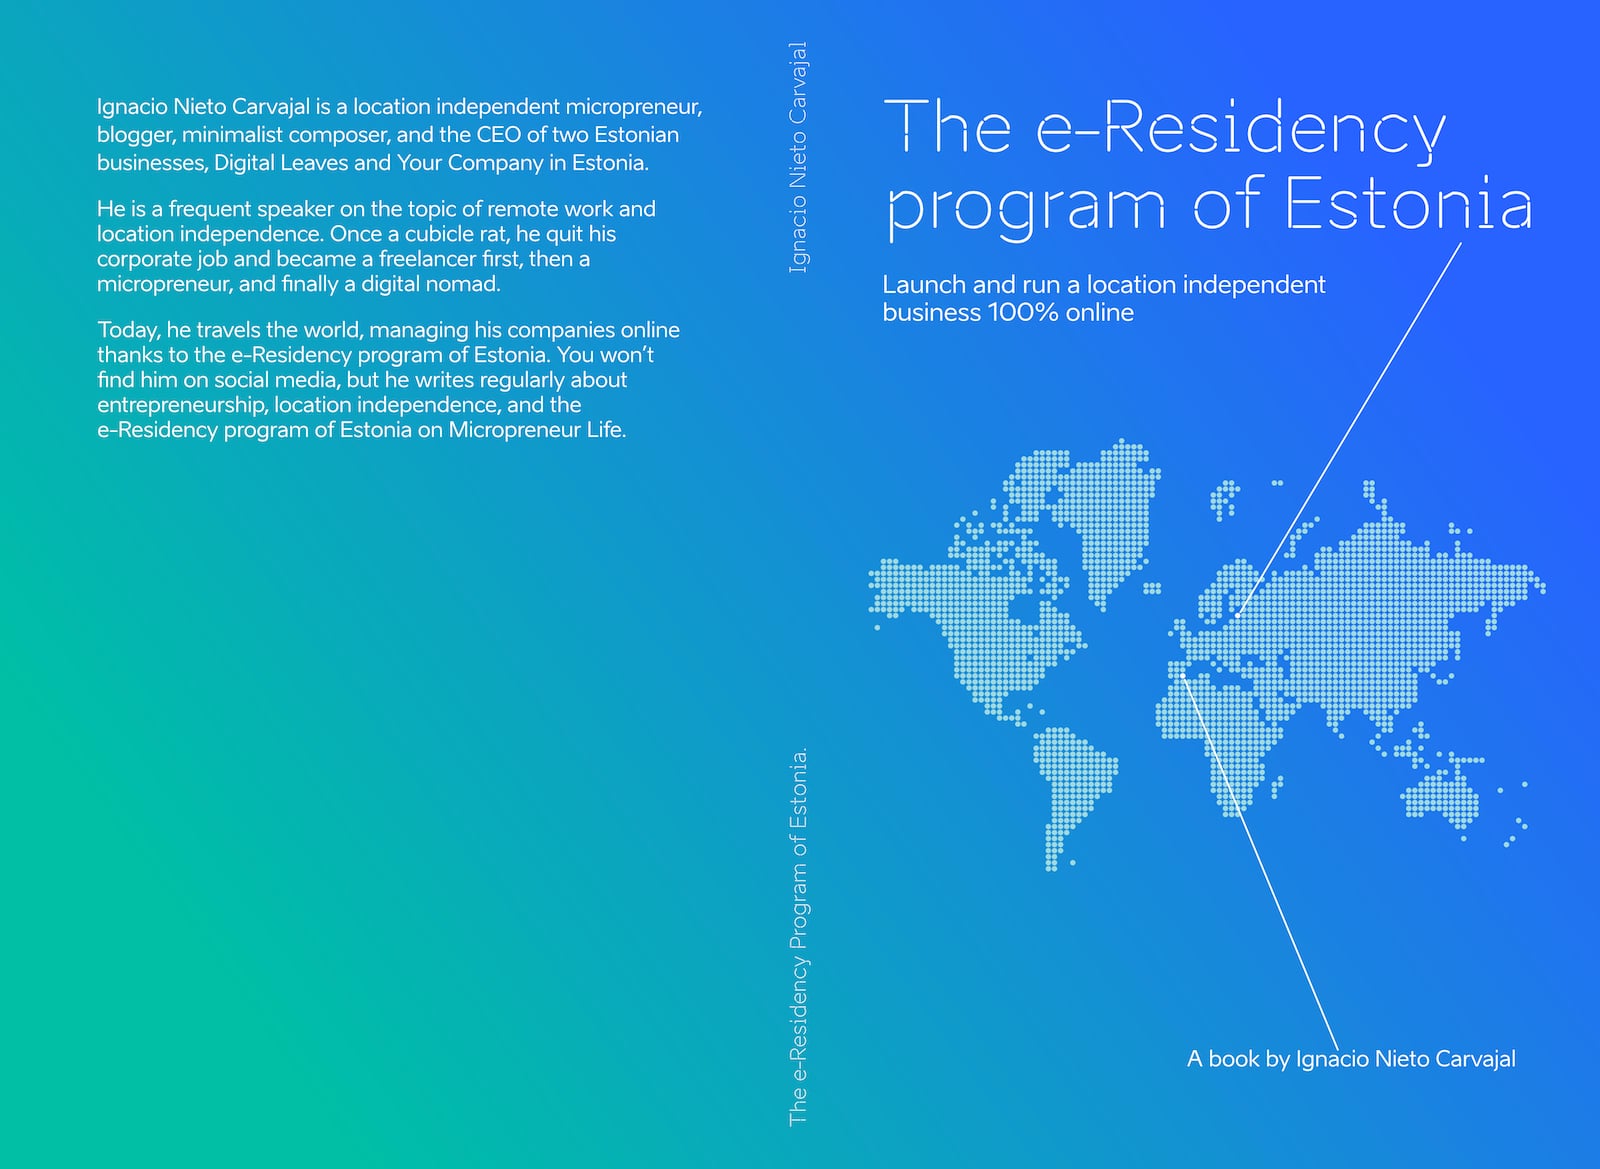
I am not a professional designer, but I do know a thing or two about design. That’s why I decided to take care of the album cover too. I love minimalist design, so I was looking for something very simple and very visual. That’s when I thought about the idea of the digital map with the two points signaling my home town and Tallinn, to convey the freedom that the e-Residency program of Estonia offers to digital nomads and location independent entrepreneurs.
So it might not be a professionally-looking cover, and it might not follow the style that’s supposed to sell in its category, but who cares? I like it.
Amazon has a tool to create the book covers, but the application itself is as dull as the sample covers it proudly shows. I decided to design it myself using Sketch and Affinity Designer Pro. If that’s your thing too, make sure to read the guidelines for the e-Book and paperback versions.
Otherwise, you can hire a professional designer or try the Book Cover tool if you are on a budget.
Make sure to release high-quality files cover.jpg and paperback.jpg. Use at least three times the minimum recommended size. My cover.jpg image was 3200×5120.
Generate the ePub (electronic publication) file
Now we need to generate an ePub file. This file can be opened in most eBook reader applications. We are going to use Pandoc. Pandoc is an open-source tool to convert between many document types, and it’s especially useful for eBooks. A must-have tool for writers.
Download the tool first. To generate an ePub file, we need a file that describes the book metadata, that’s it, all the information about the book, like the author, title, date, language, etc. This data is important and will be used by the readers when opening your book.
This file is in a format called YAML. You don’t really need to know a lot about it. Just copy the text below or download it, modify it accordingly, and save it in a file called metadata.yaml in the same directory where you keep your book .md file:
 ---
 title:
 - type: main
   text: The title of your book goes here
 - type: subtitle
   text: The subtitle of your book goes here
 creator:
 - role: author
   text: Your name here
 identifier:
 - scheme: DOI
   text: doi:10.234234.234/33
 publisher: Self Published
 rights: Copyright © 2019 Write here some copyright line
 date: 20XX-MM-DD
 lang: en-US
 description: Write a one or two line description of your book here.
 cover-image: cover.jpg
 css: book.css
 ...
The CSS file that appears at the end (book.css) contains the style of the book. Essentially, every ePub or Mobi e-Book you read on Apple Books or your Kindle is just a specially formatted webpage.
Getting the CSS of your book right implies some trial and error. The ones I found on the internet didn’t display well on all devices, so I tweaked my own file until I was satisfied with the results. You can download it and use it for your book. Just put it in the same folder as your book.md, cover.jpg, and metadata.yaml files.
Now open a terminal, go to the directory where the files are, and execute this command:
pandoc -o book.epub metadata.yaml book.md --toc --css=book.css --toc-depth=1
That will generate a book.epub file. You can drag & drop it to iBooks or your reader of choice and check that everything is correct. Verify the table of contents, cover, and content hyperlinks such as footnotes.
Generate the Mobi file
Now we need to do yet another transformation. Amazon Kindle devices work with books in .mobi format, so we need to generate that file from our .epub book.
To do that, download the Kindlegen application from Amazon. Put it in the same directory where you keep all your book files and run the following command:
./kindlegen book.epub -o book.mobi
The output will be the book.mobi file that you can add to your device. If you, like me, don’t have a Kindle device, you can open it with Kindle Previewer to make sure it displays beautifully. The app is slow as hell, so be patient.
Generating the paperback edition
So I can use that Mobi file for the e-Book and paperback edition, right? Well, unfortunately not. Obviously, with Amazon, it was not going to be that easy.
The .epub and, by extension, the .mobi file, is nothing more than a website container containing the Html code, some metadata and a basic styling that will display well on all readers of most devices, from the humblest Kindle to the most expensive iPad Pro.
These tools work with the basic formatting specified in the .css file. That formatting is not appropriate for a paperback edition of your book. It will look too dated and bland.
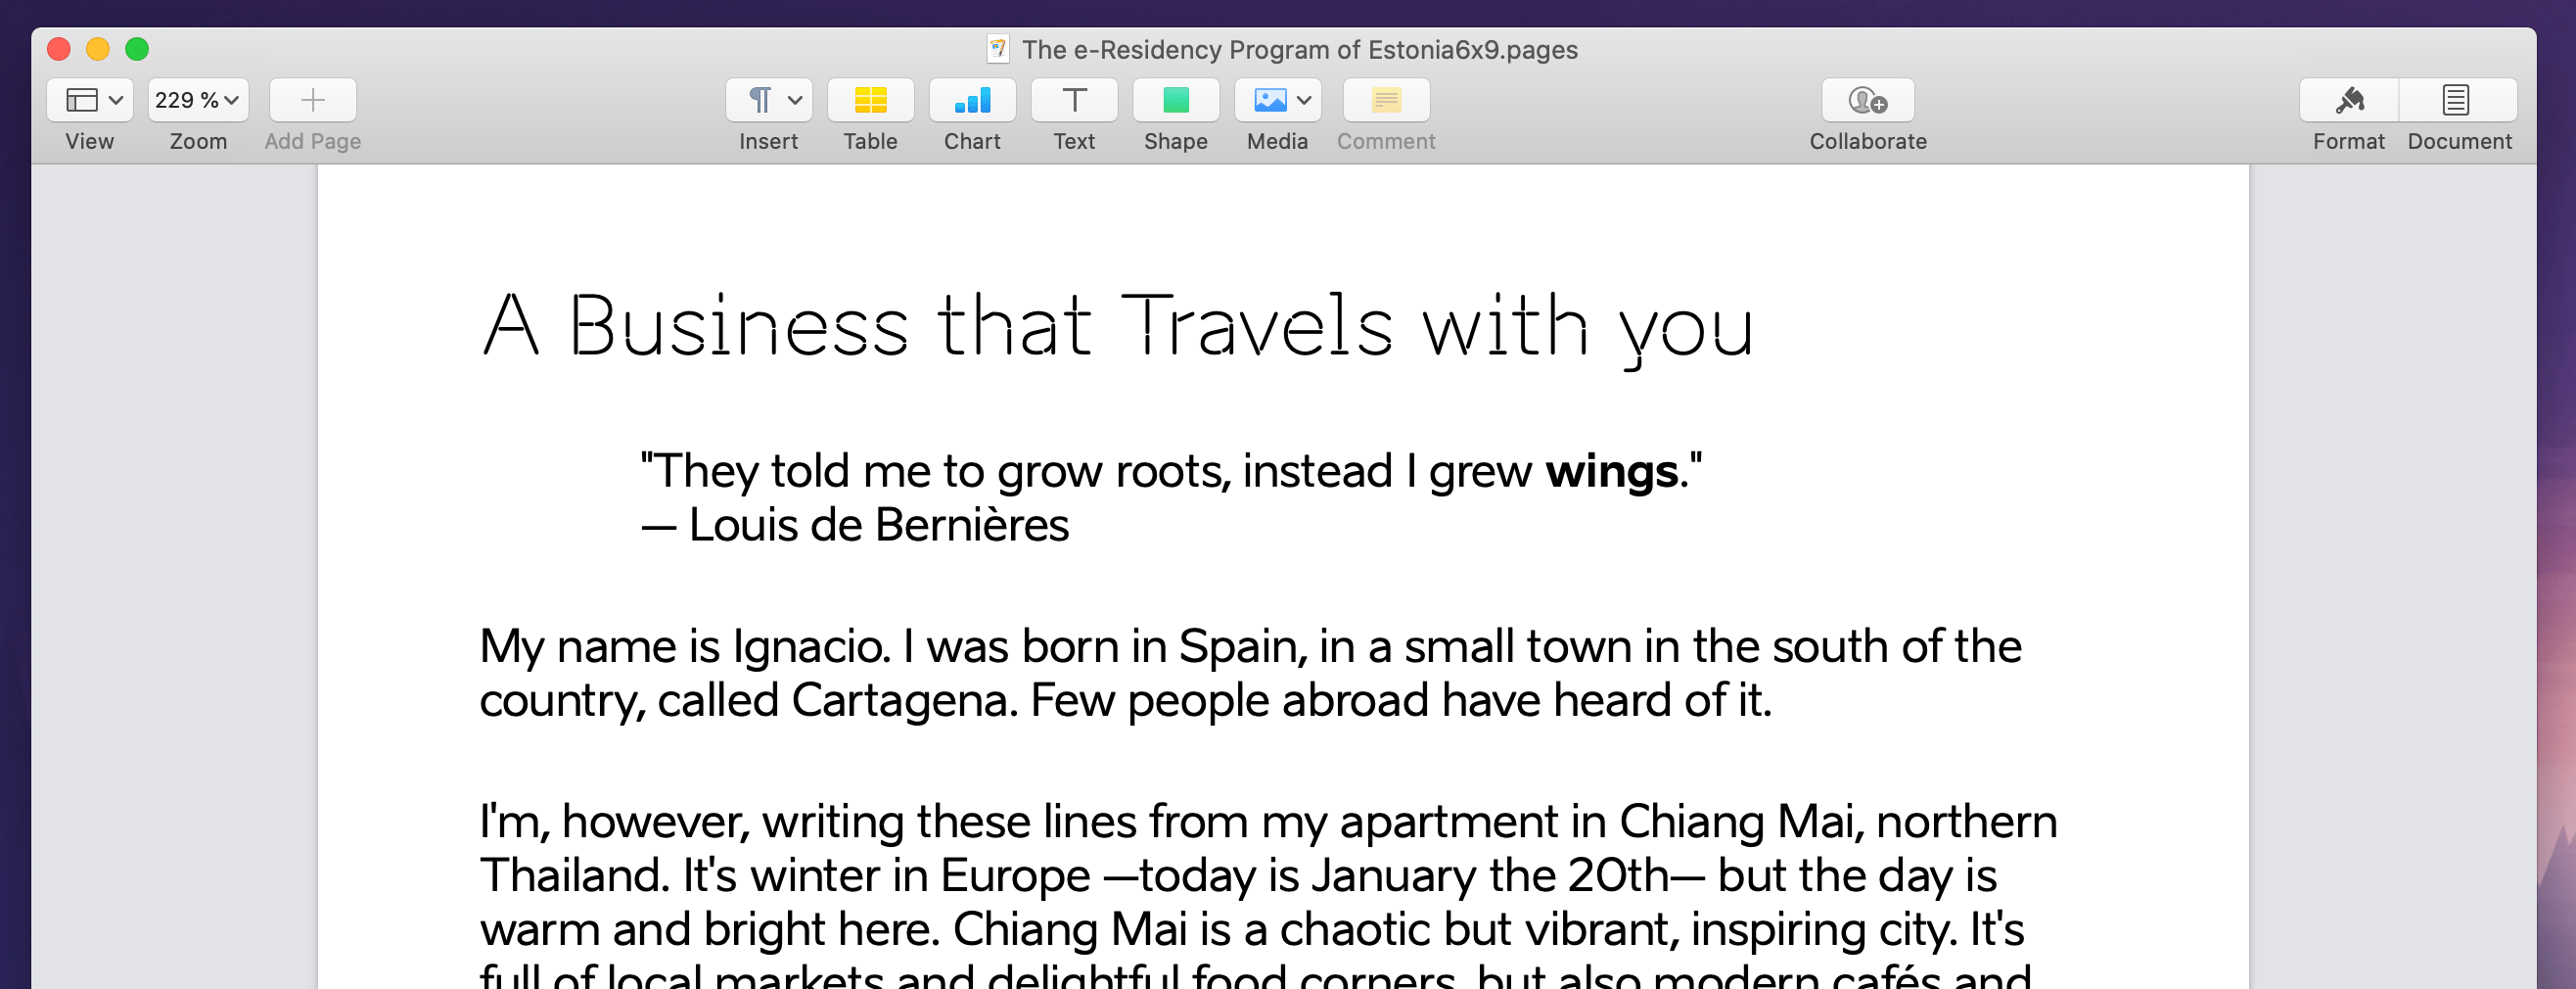
That’s why you need to generate a Word or PDF version of the book with the right style. I used pages for that, but you can use MSWord, OpenOffice, or your favorite program. Contrary to the markdown syntax, here you want to take care of all the visual details, format, typography, colors, spacing, etc.
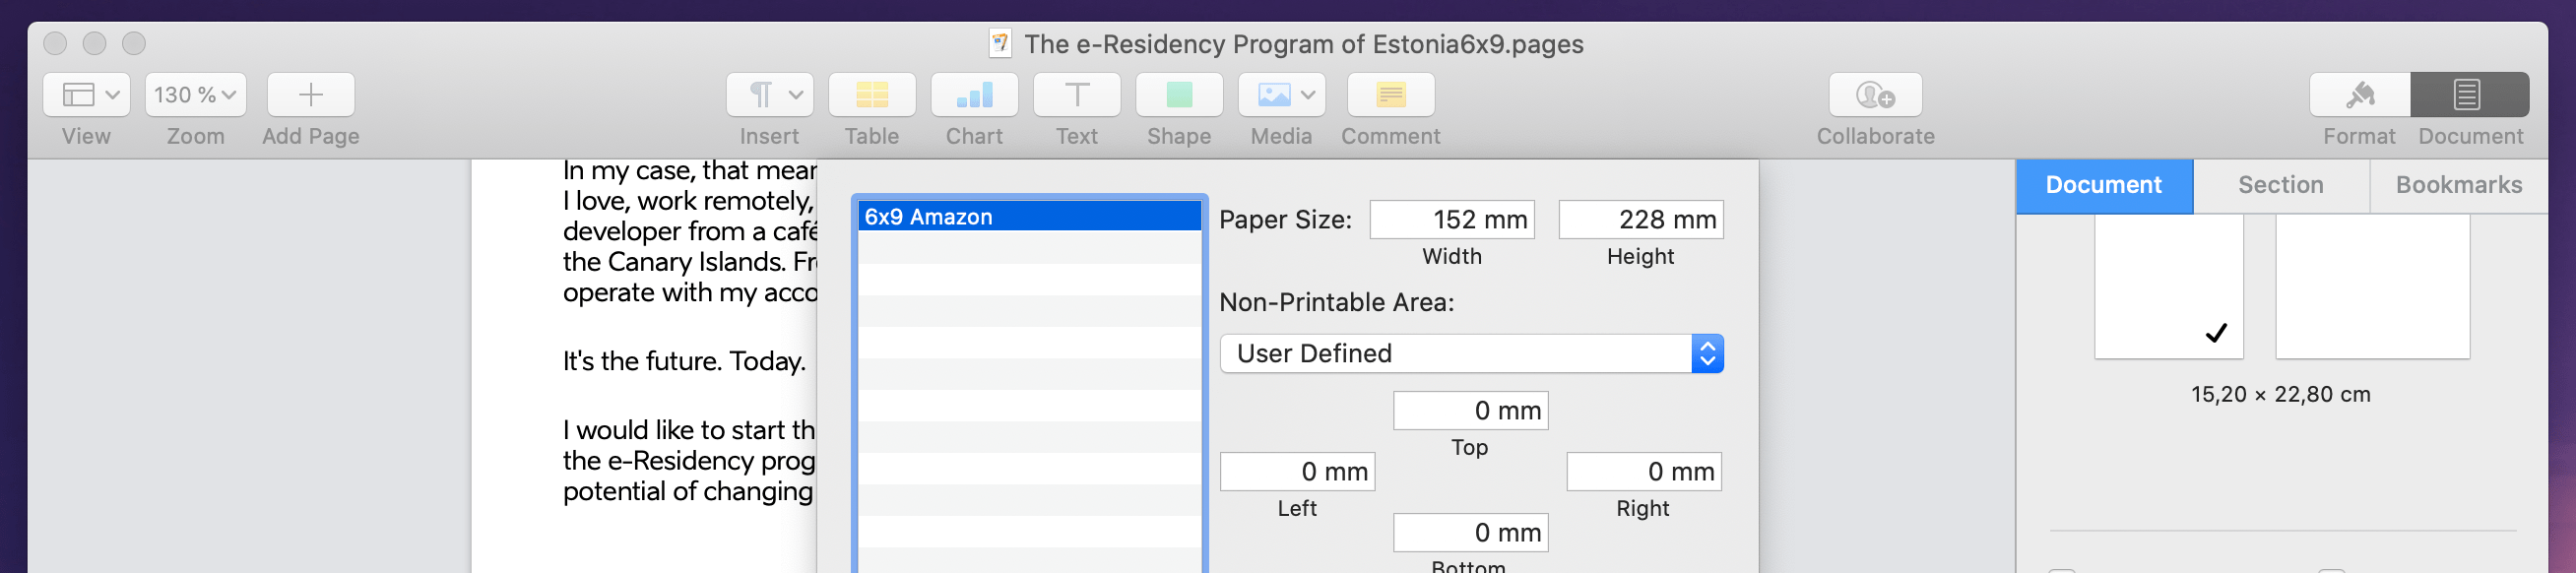
Make sure to format your document in 6×9 inches. You can do that in Pages in the File > Page Setup menu. Expand the “Page size” dropdown and select “Manage custom sizes”. You will need to specify this 6×9 size when uploading the paperback edition on KDP later.
Most of these programs allow you to export a PDF version. Make sure to go through it thoughtfully to check for formatting mistakes.
Uploading it to Amazon KDP
Now it’s time to upload it to Amazon KDP!
First, go to Amazon KDP and sign up if you haven’t already. You will need to fill in some information. Then, go to the “Create a new title” section. For some weird reason, You need to create the e-Book and paperback versions separately, and then amazon will hopefully “link” these two versions together one week later (don’t ask me why).
First, click on the “+ Kindle eBook” to upload the e-Book version. The process has three steps. First, you need to fill in the eBook details.
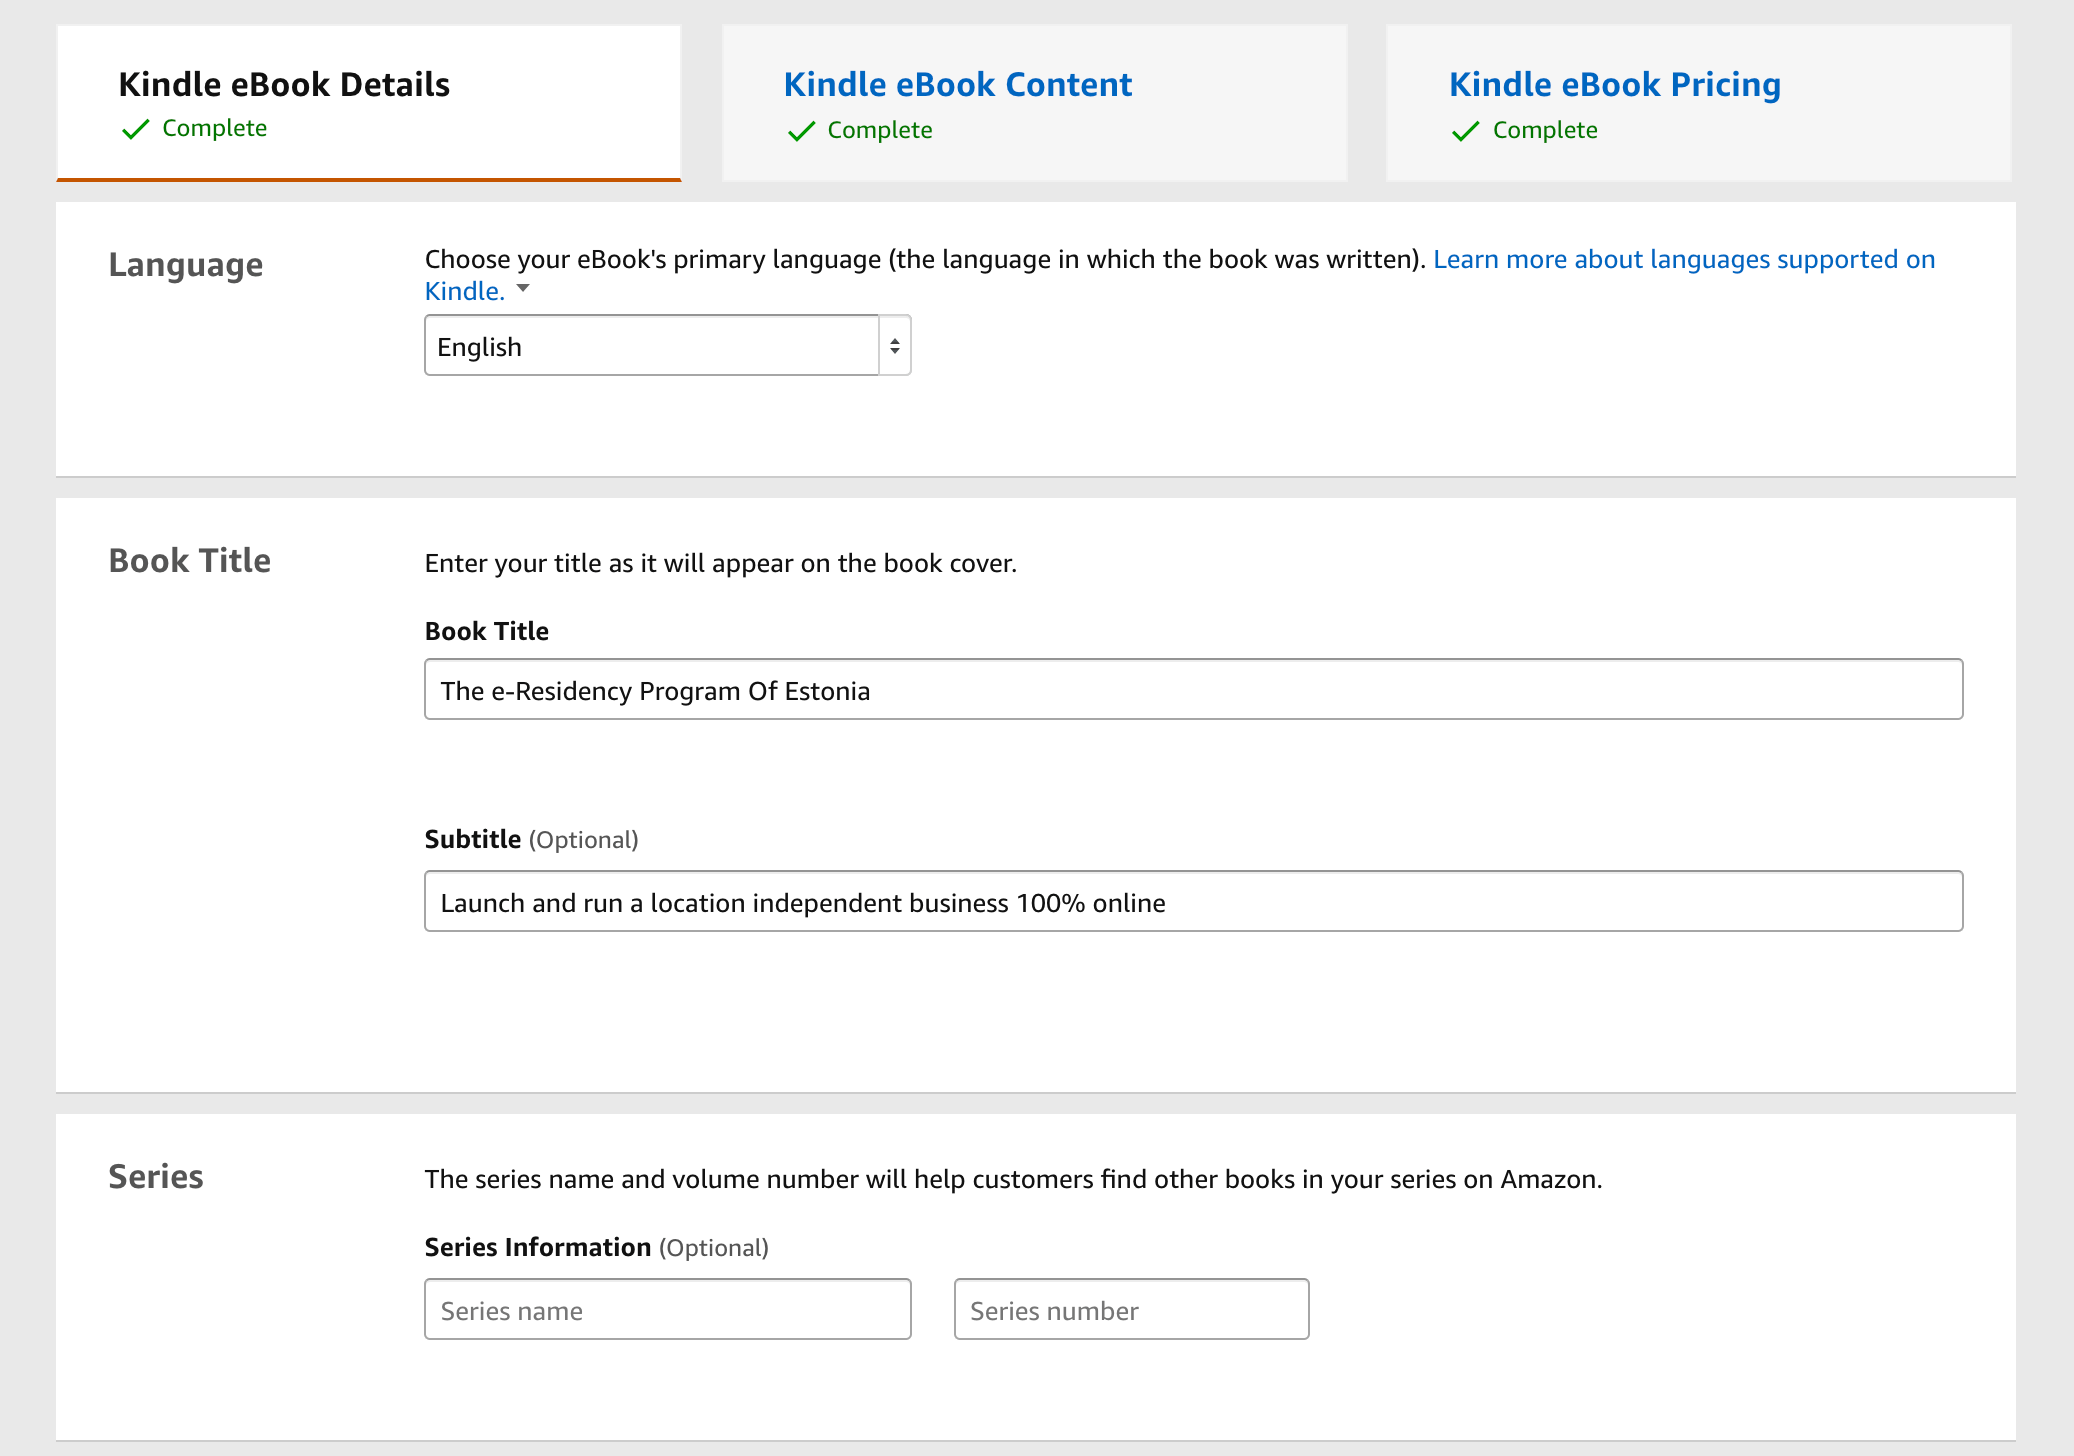
Here, it is important to choose the right categories for your book. I find them quite limited (i.e: there’s no category for digital nomads, the closest one is “travel guides”). If in doubt, it’s a good idea to look for similar books on Amazon and see what categories they selected.
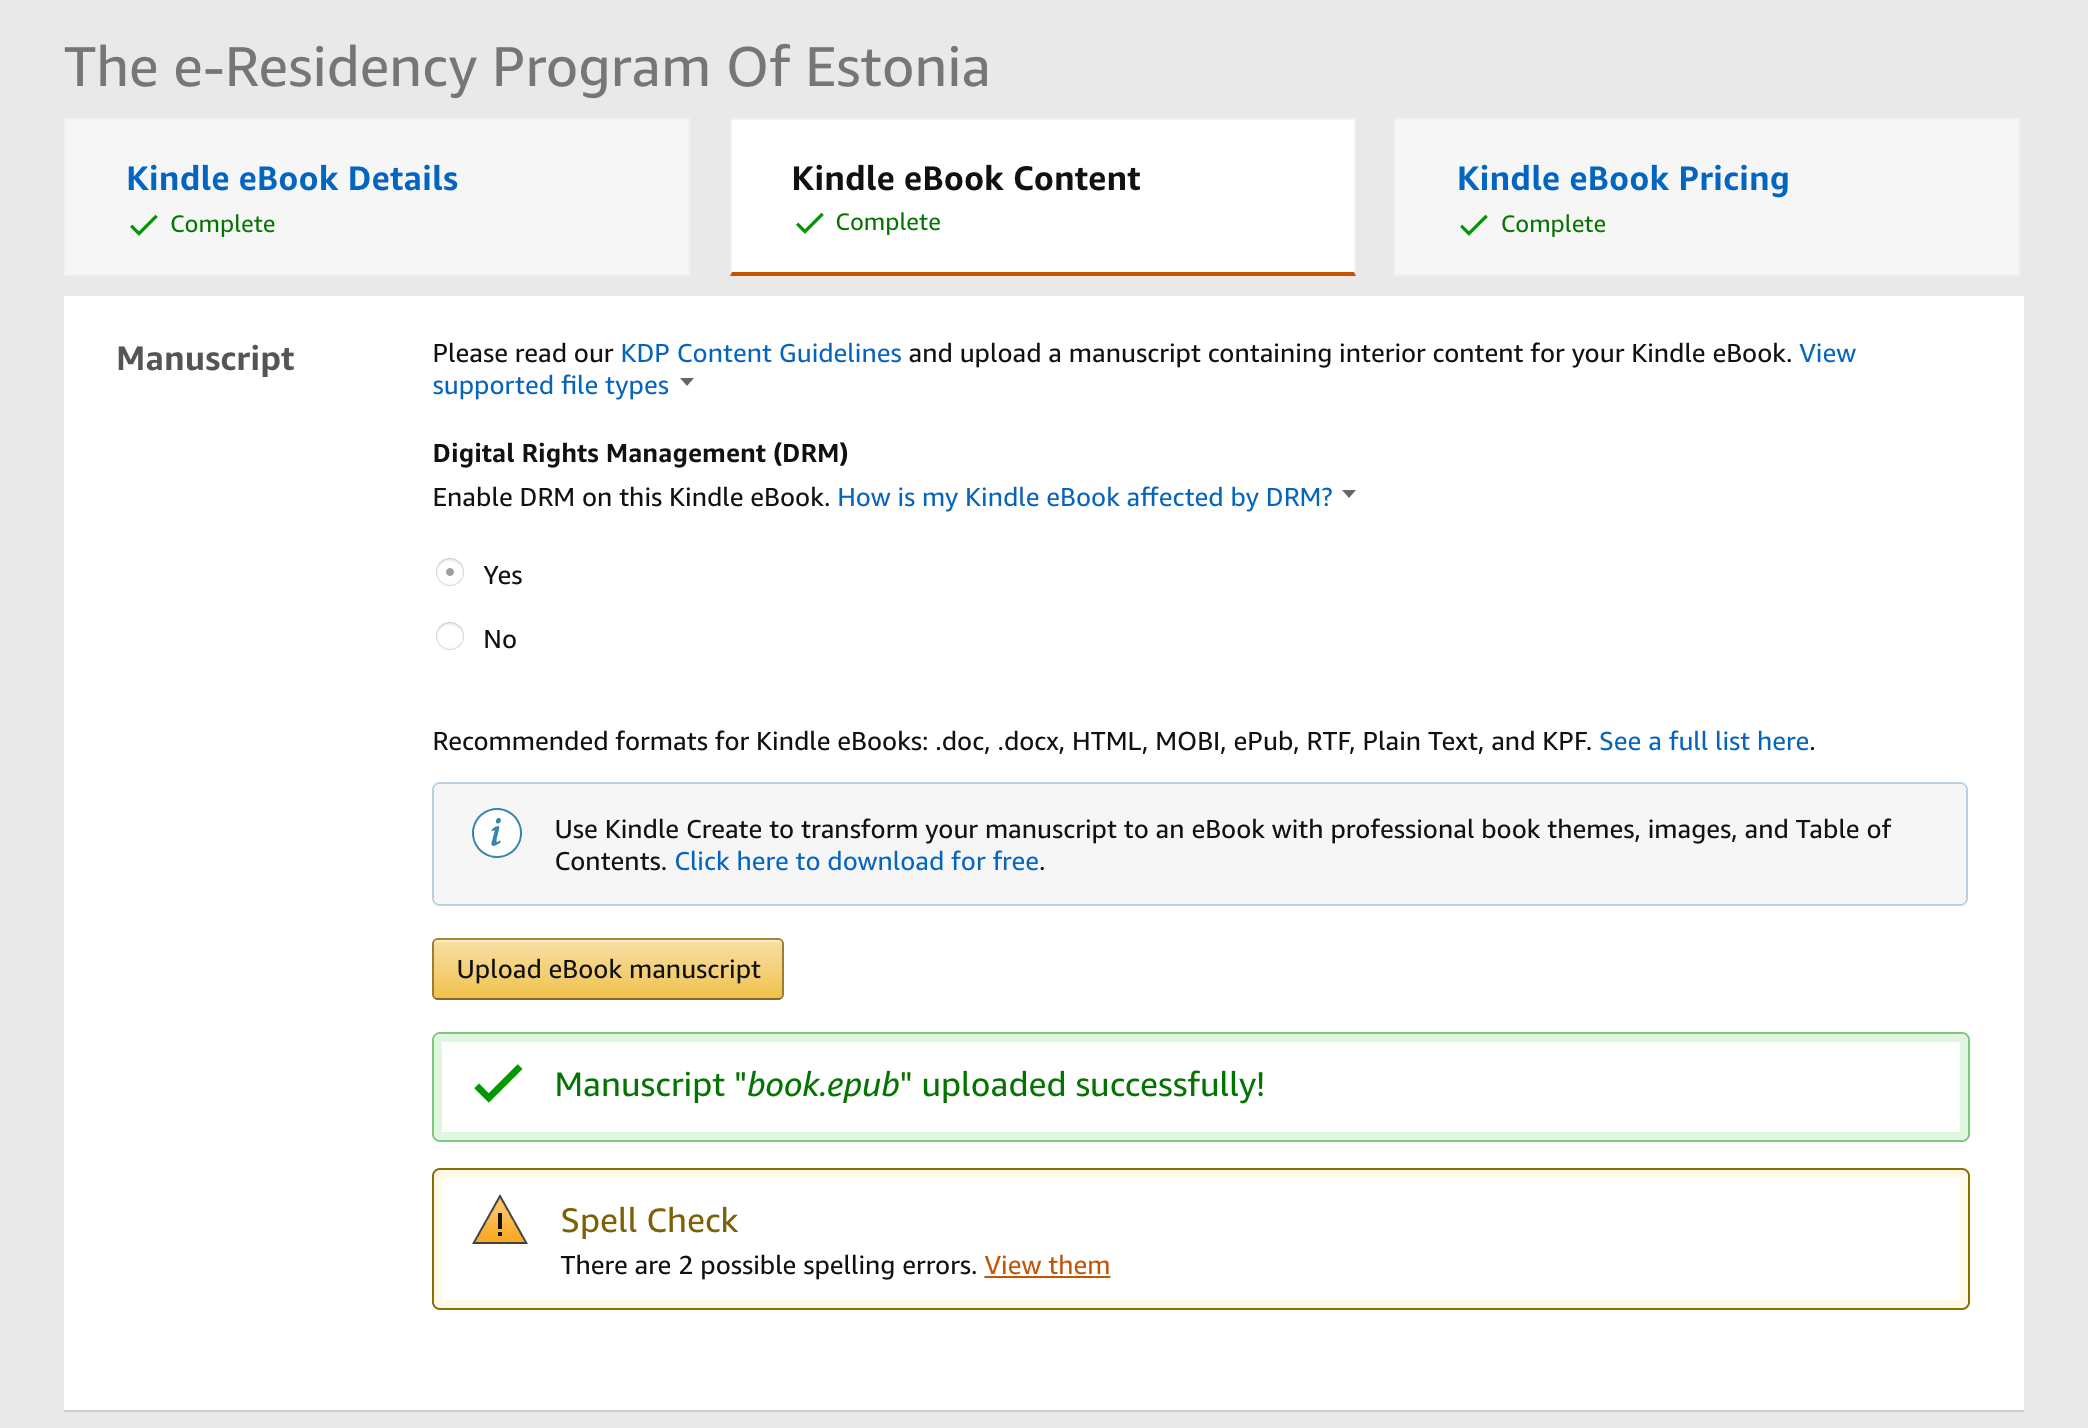
In the second step, you need to upload the eBook file. The submit form seems to have been designed by AOL in the 90s and never updated. So expect the process to be slow, clumsy and buggy as hell.
Still, make sure to check the book once uploaded in the preview tool at the bottom of the page. It took me several attempts to be able to submit the book. I had to tweak the CSS file I shared with you earlier a lot to get this right. Hopefully, the process will be smoother for you with the right file.
Then, on the final screen, you are faced with two important decisions: the price of your book, and whether or not to enroll in KDP select.
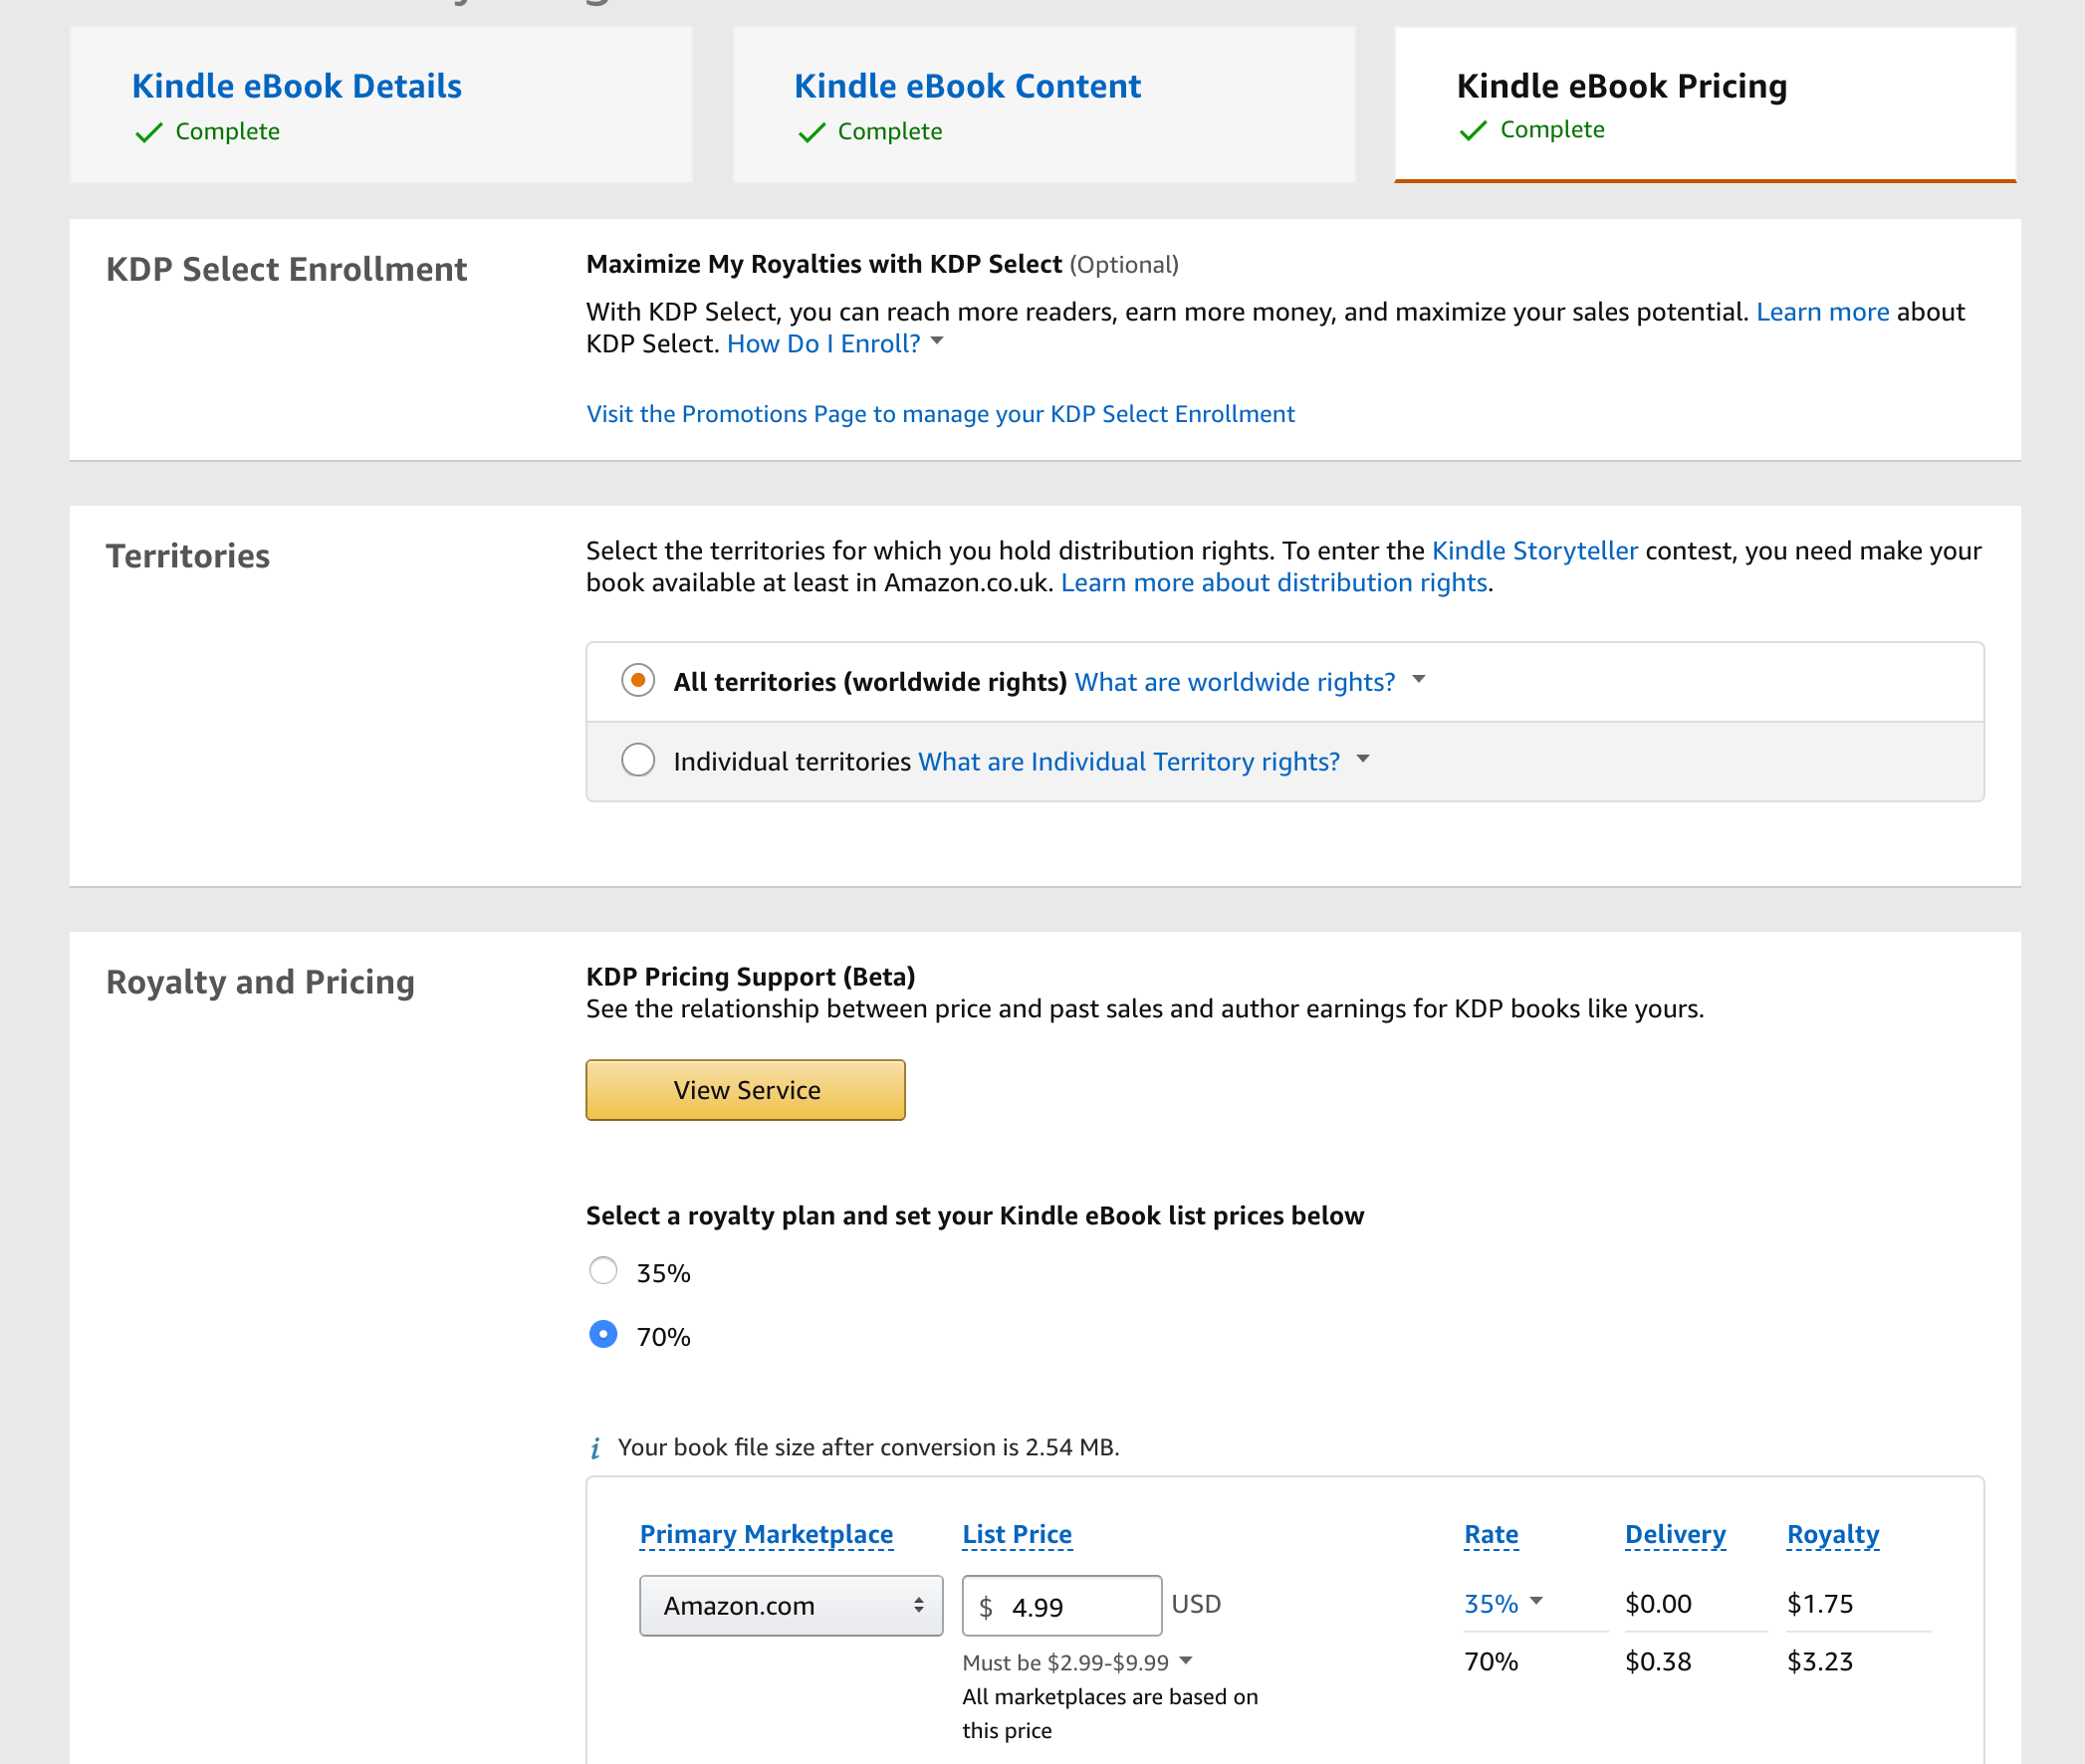
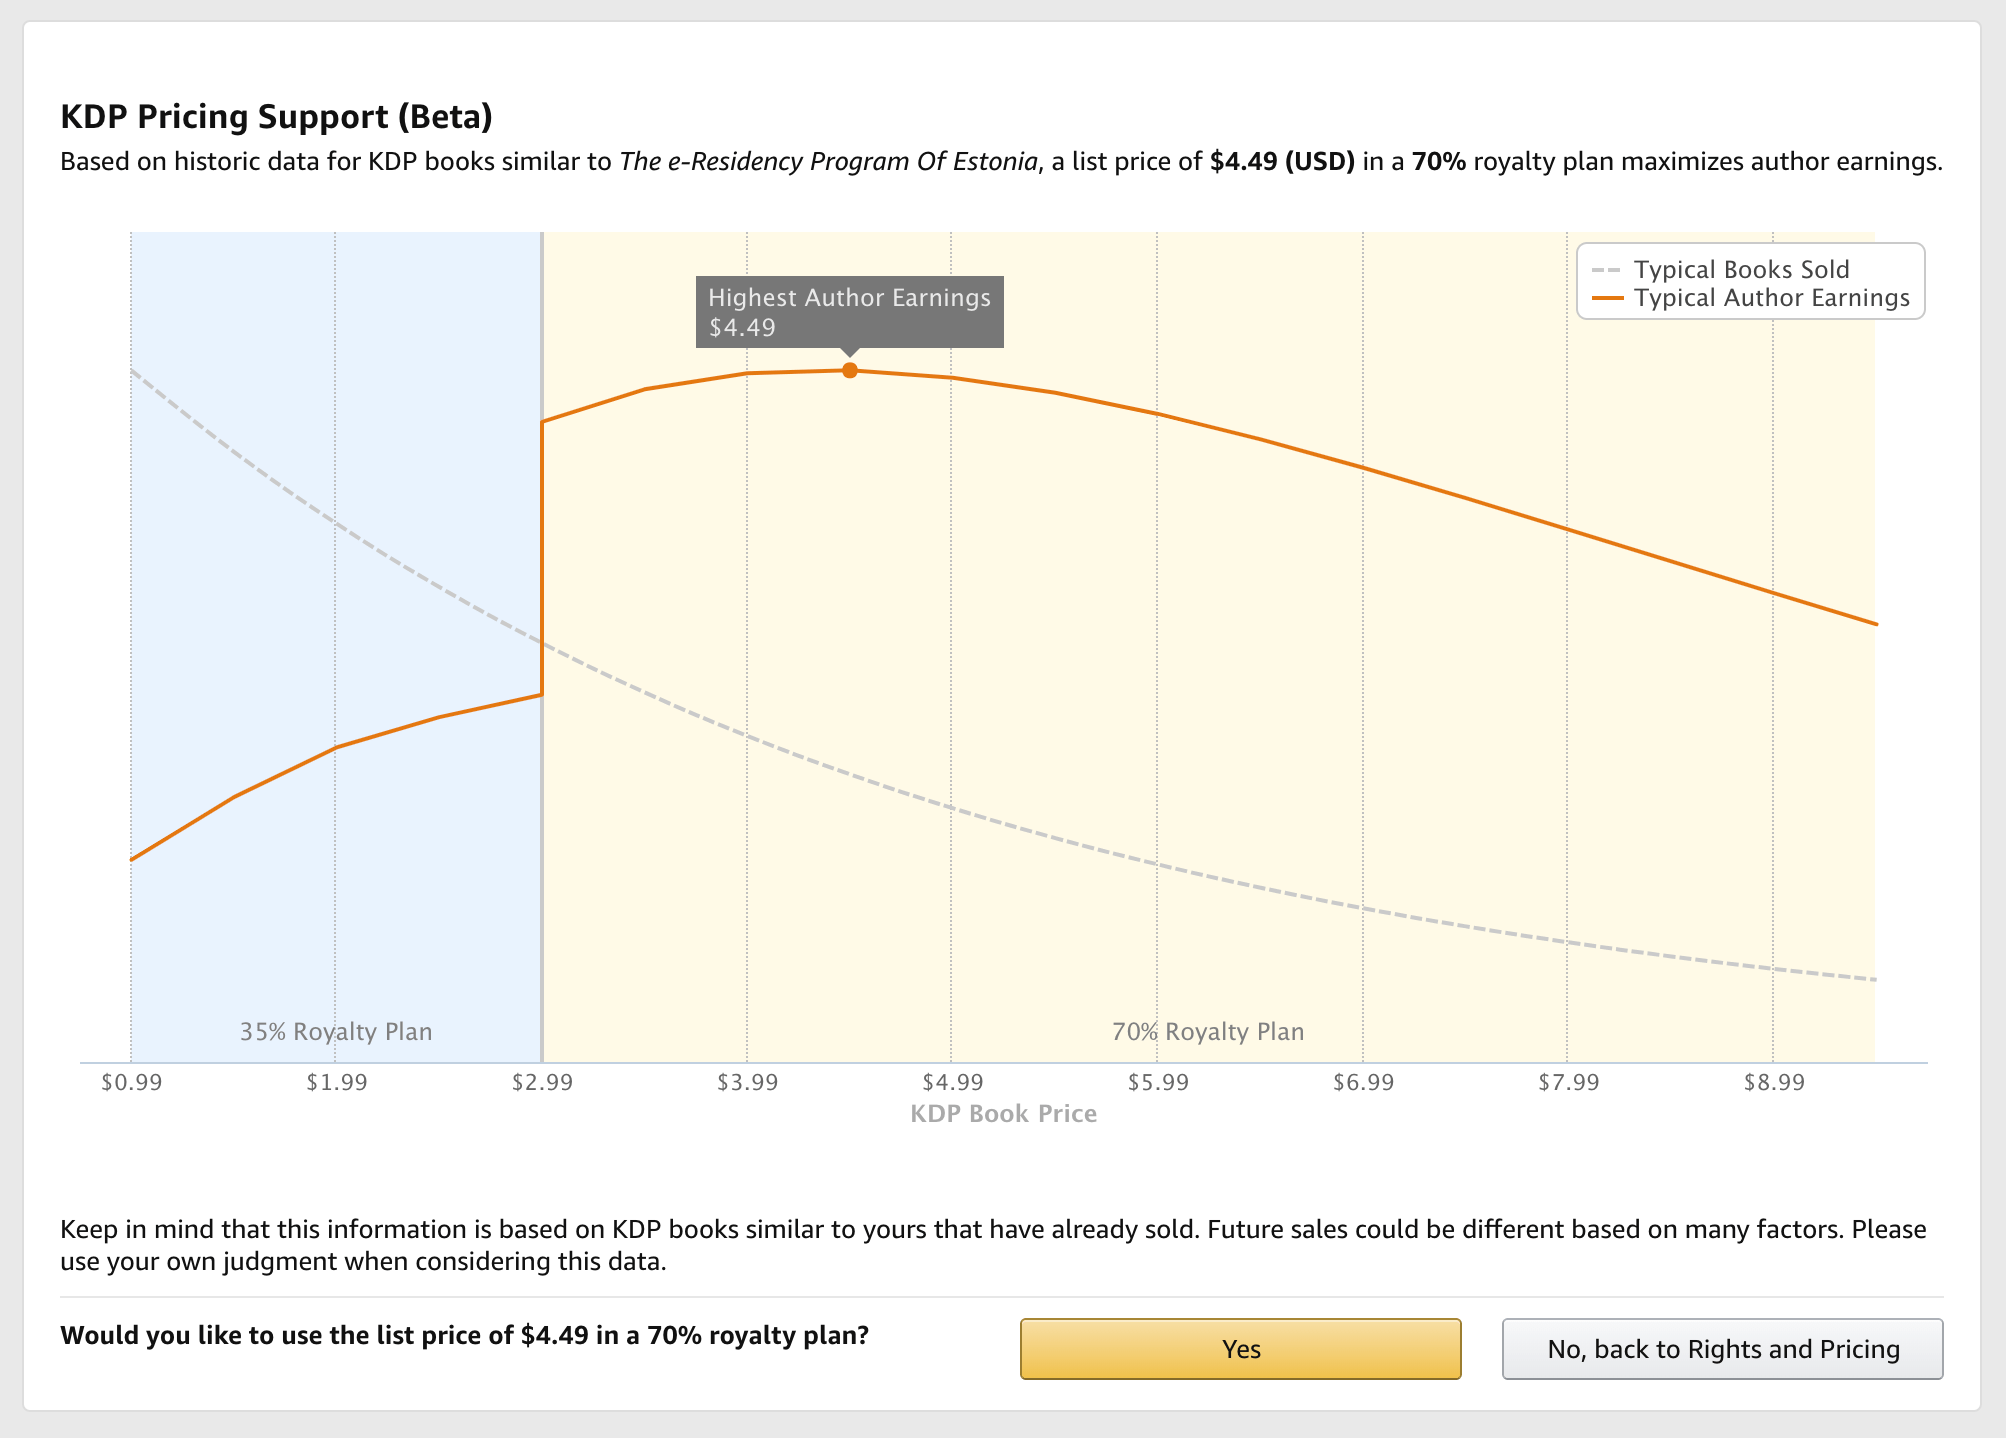
I talked about KDP Select above, but what about the price? For my book, I had a completely different price in mind, around $10. However, Amazon offers a graph with the relationship between the price and sales of similar books on Amazon KDP, suggesting a sweet spot.
I didn’t choose the price suggested ($4.49) but I went for something closer to that amount than the one I had planned initially.
Also, take into account that in order to receive 70% of royalties for your book, it needs to be listed between $2.99 and $9.99. Otherwise, your earnings will drop to a shameful 35%. Welcome to the professional writer’s world!
Once you make these two important decisions, check all the information again, and click on “Publish”. If all goes well, in 2-3 days, you will receive an email from Amazon letting you know that your book is online. Congratulations! You made it!
Paperback edition
Dear sir or madam will you read my book
The Beatles – Paperback writer, 1966
It took me years to write, will you have a look?
Once you have published the e-Book version, it’s time to take care of the paperback edition. The process is quite similar, but this time you need to be extra careful with the preview stage. Make sure the text stays well inside the safety margins. Remember that the physical book works differently due to the joint of the pages.
When published, the paperback edition and the e-Book edition will be “different books” and have different pages. Only after a week or so, Amazon’s algorithm will figure out they are indeed the same book and put them together, but only if you entered the exact same information for the book (title, description, author, etc).
Promotion! Promotion! Promotion!
Of course, no book will sell by itself. Before writing a single word, you should think first about how you are going to promote it.
But that’s a different story for a different day…
Conclusion
In this article, I explain how to self-publish your e-Book on Amazon KDP and Amazon KDP Select. Writing my first book was an amazing experience. Publishing it on Amazon… not so much. But I wanted to share it with you to help you get your first script out in the wild.


Comments ()